Timeline: Planned
The timeline view divides a day into hourly slots. You can drag to create "planned time blocks" for scheduling.
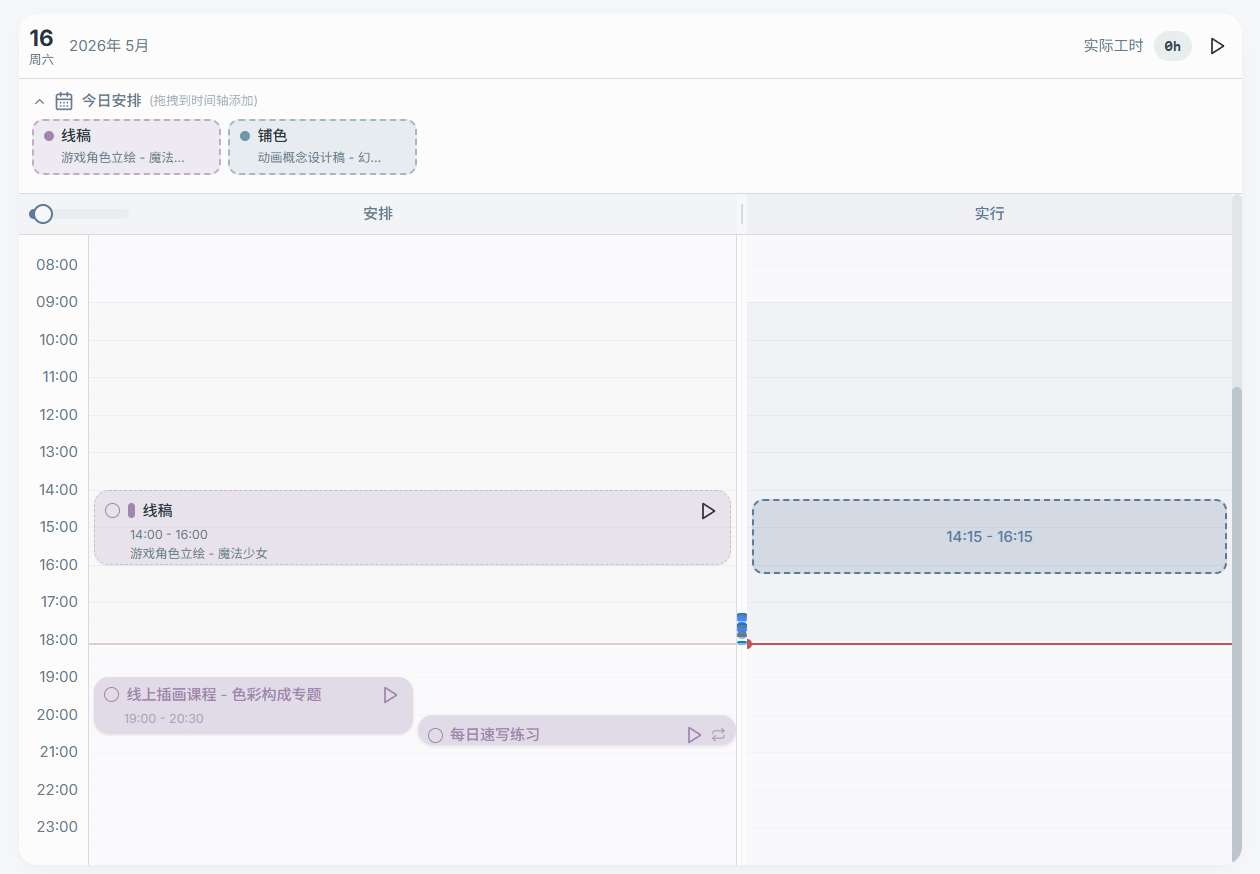
Today's Schedule (Top Fixed Area)
Above the timeline is the "Today's Schedule" area:
- It doesn't scroll with the timeline, so you can always see "what to do today" at a glance
- You can drag tasks, milestones, or to-dos here
- The area can be collapsed to save space
- The placeholder text typically reads "(drag to timeline to add)"

1) Drag from the Sidebar to Create a Planned Block
You can drag:
- Task milestones (recommended: more precise scheduling)
- Whole tasks (suitable for rough planning)
- To-dos (suitable for scheduling checklist items)
After dragging onto the target date, drag out a time slot in the "Planned" column to create a scheduled block.
2) Adjust a Planned Block
Once a planned block is created, you can typically:
- Drag to move it (change start time)
- Resize the block by dragging its edge (change duration)
- Open a popover/dialog for precise editing (start time, duration, etc.)
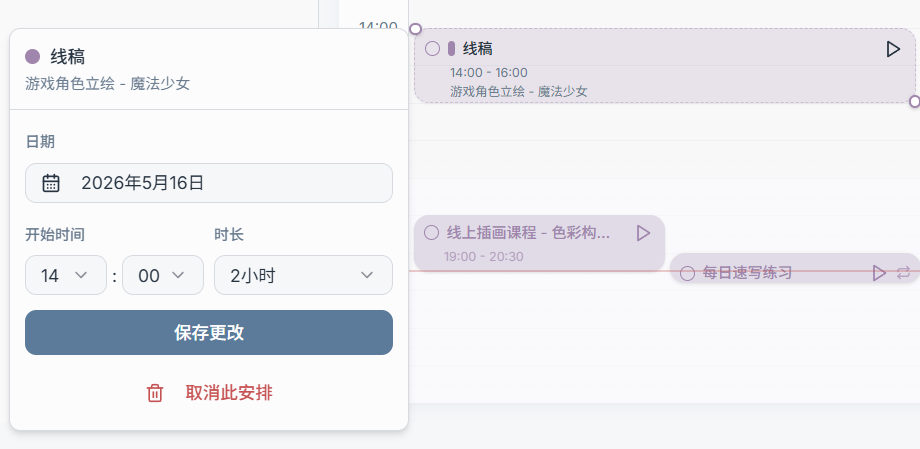
3) Remove a Planned Block / Delete a Scheduled Entry
The planned block's context menu generally provides an "Unschedule" or delete option.
Note: Unscheduling only removes the time block — it does not necessarily delete the task or to-do itself.
4) Multi-Day Timeline: Displaying Planned and Actual Columns
When you increase the number of displayed days (e.g., 3 days, 7 days), the calendar shows multiple columns. Some versions may offer:
- Show Planned only
- Show Actual only
- Or display both columns side by side on a wide screen
(The interface typically shows a "Planned / Actual" toggle button.)